Kinetic Text
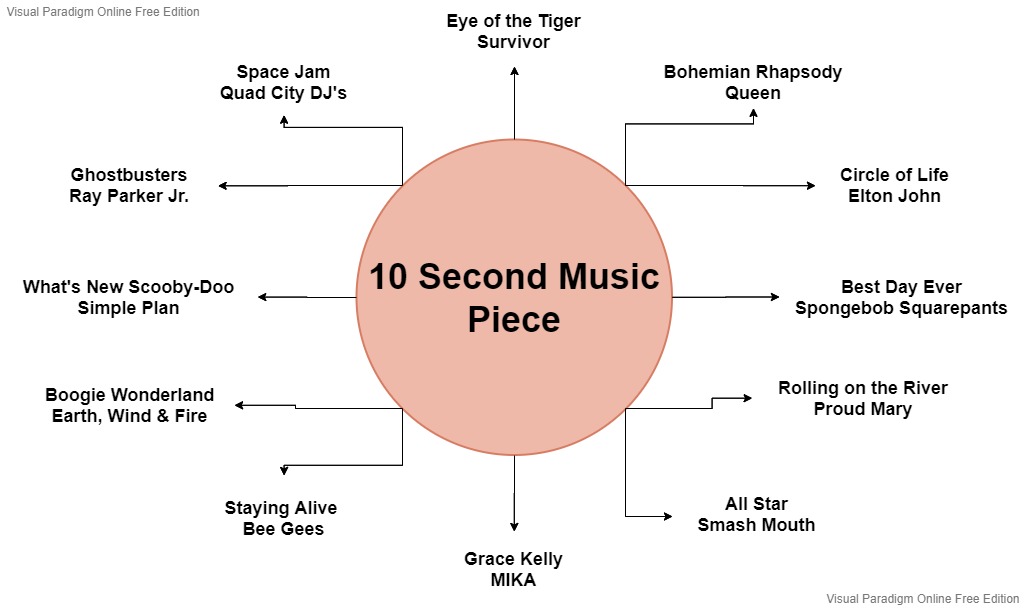
For this Assignment, I had to create a 10 second (HDTV 1080 25) animated typography sequence using a Song of my choice using Adobe After Effects to make the video. The song I choose to use for my Assignment was "Bohhemian Rhapsody” performed by Queen. I chose this song because I am a huge fan of "Queen" and I love listening to their songs/music when I'm out and about or relaxing at home. And Bohhemian Rhapsody happens to be my favorite song that they perform. Here is a brainstorm I made to show what other songs I was considering doing.
Editing this in After Effects, I decided to use effects such as Opacity, Rotation, Scaling, etc.. because I was still learning how to use After Effects so that's why I didn't use Animation Presets for my Kinetic Text. I chose to use Blue for my text because it was the only colour that fitted with the background picture I chose. For the background i decided to use an image from the movie of the name of the song because I wanted to refrence it the best way I could.
How I Made it
Once I had chosen my song, I first had to trim/edit the audio down to the section I wanted to use. I did this by using Adobe Audition.
My audio piece ended up being 24 seconds long, but I didn't mind, I knew how I wanted to edit the verse I had chosen. Once my audio was edited, I could now start work on my Kinetic Text video. Once my After Effects file was ready for me to use, I imported the piece of the music I had trimmed in Adobe Media Encoder and a Background picture I wanted to use for the background instead of a normal colour. I used this picture from the Movie “Bohemian Rhapsody”. Next I added "Camera Lens Blur” effect to the Background image because I didn't want the picture to be seen clearly while the video would be playing.
Since I had my text font decided (Capital Clickbait - Chequered Ink), I now had to choose what colour the text should be. I originally wanted to use Red or a darkish shade of Orange, but when I tested them both, it did not really work too well because my background image made it quite tricky to see, so I decided to use Dark Blue since it made it easier to see the lyrics.
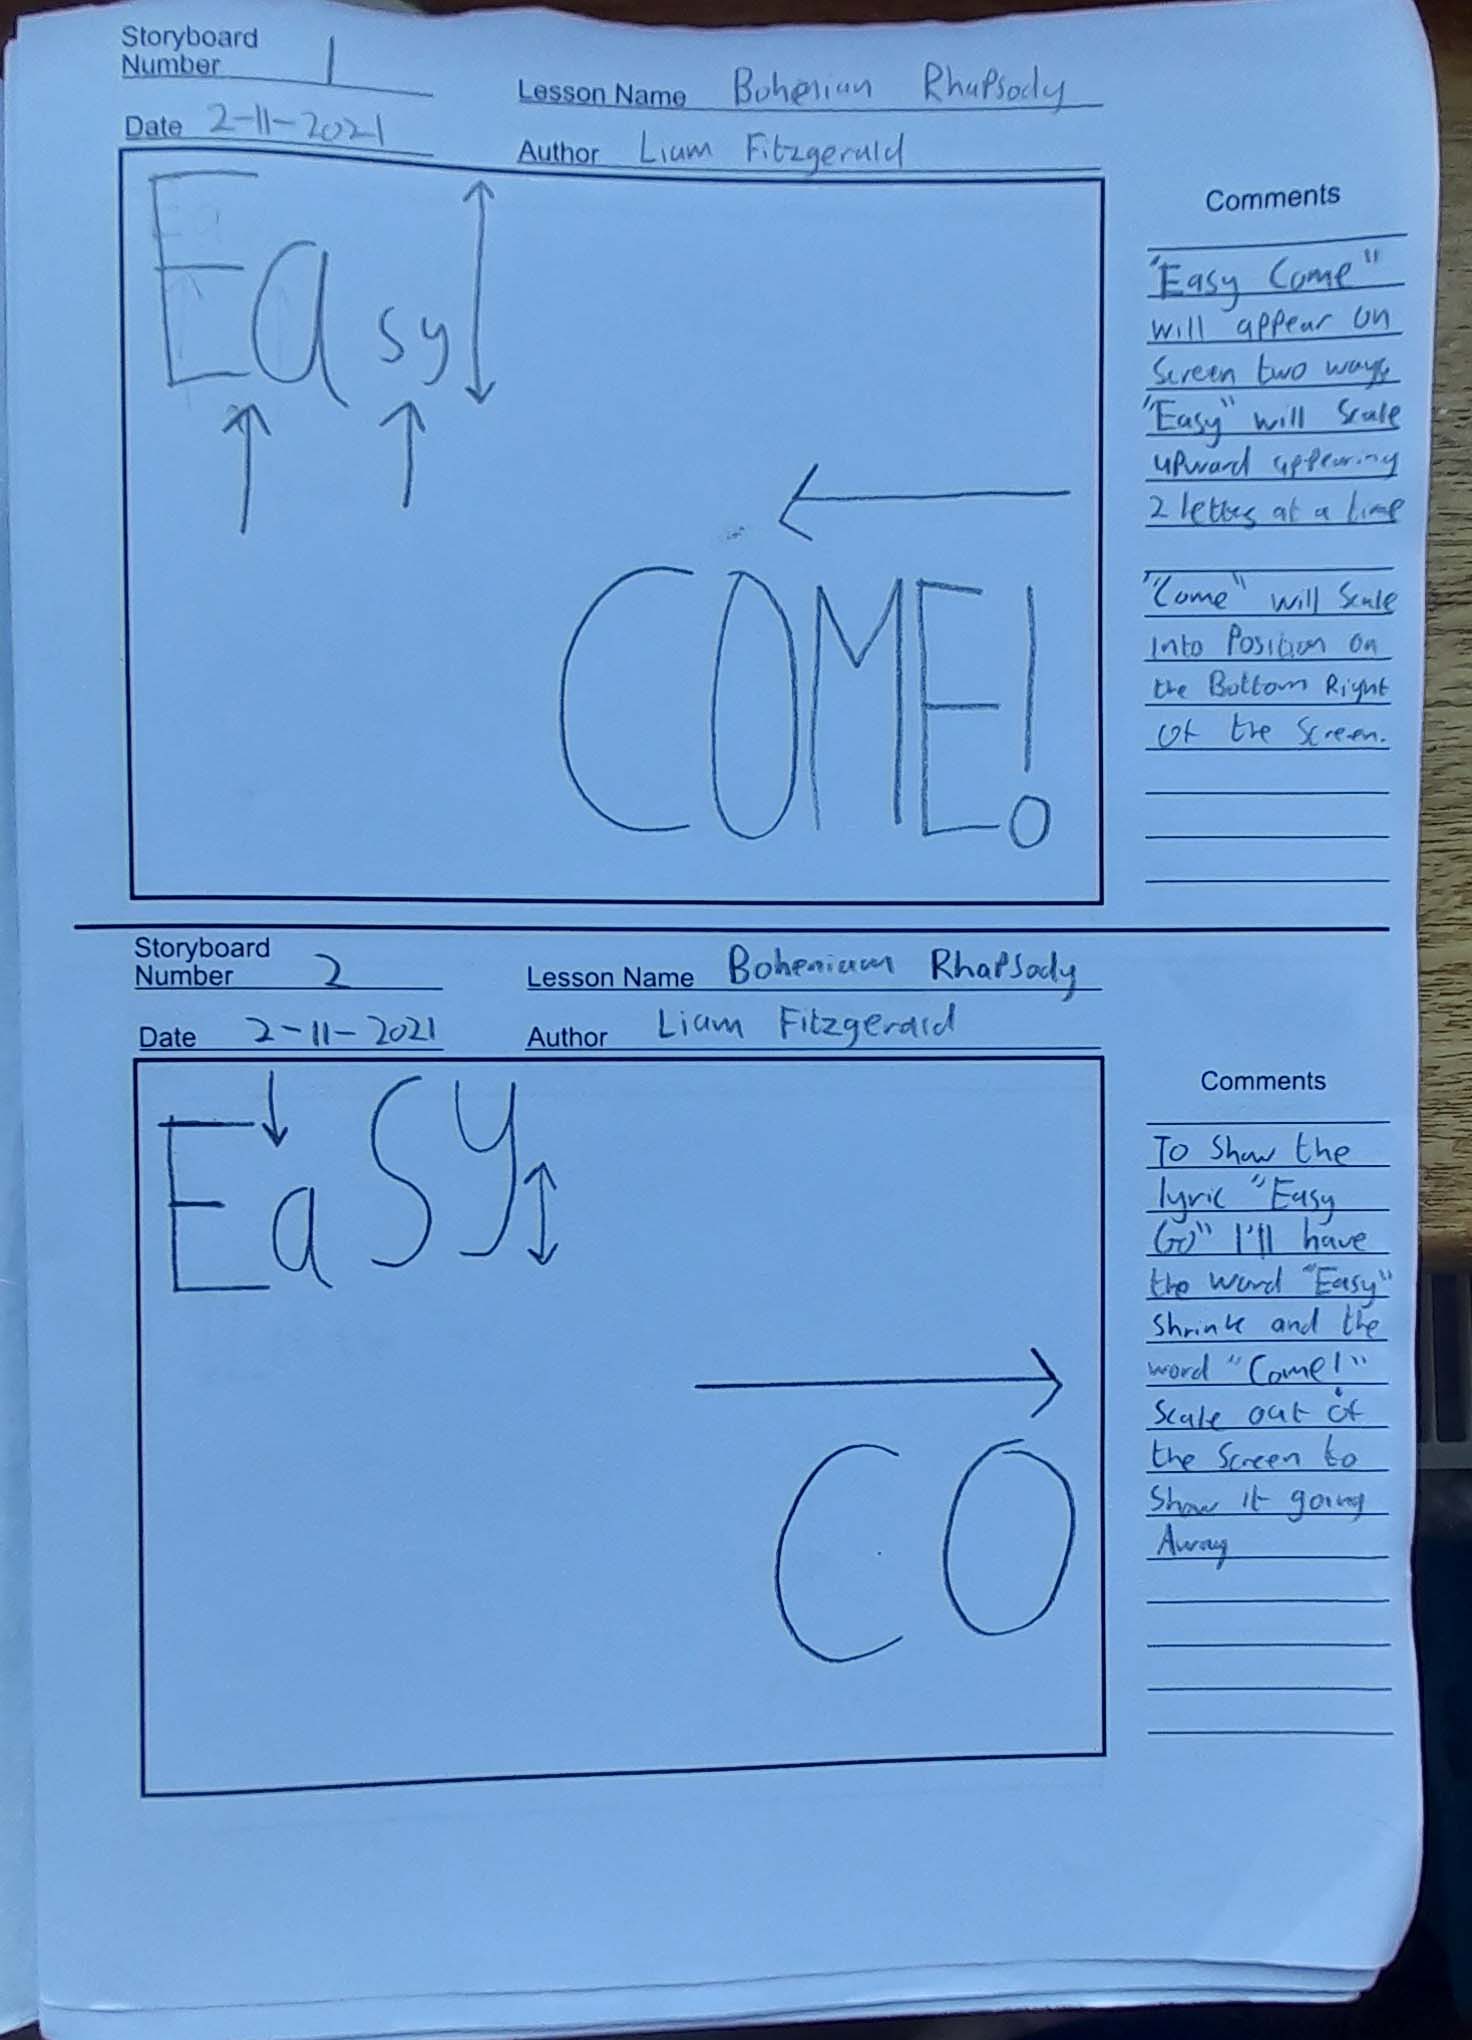
The first lyrics of my song piece are “Easy Come, Easy Go,” for these lyrics like I drew in my storyboards, I wanted the text to look like it was coming and going on the screen. I had to split the word “Easy” into two separate syllable text layers because that was the way it sounded in the section of song I was creating. For both layers, I Positioned them both on the top left of the screen while I positioned the word “Come” on the Bottom Right of the Screen with a size of 246px (Easy) and 402px (Come). Once positioned, I animated them both to scroll onto the screen. For the word “Easy” I made both separate layers scroll upwards to the top of the screen, and I animated the word “Come” to scroll sideways onto the screen. Next thing I had to do was the make the lyrics animate off the screen because I wanted it to represent the lyrics “Easy Go,” so I wanted the lyrics to seem like they were going away. So, each text layer, I clicked on “Animate” and selected “Position” to add Range Selector. Using this, I was able to make the lyrics scroll of screen again.
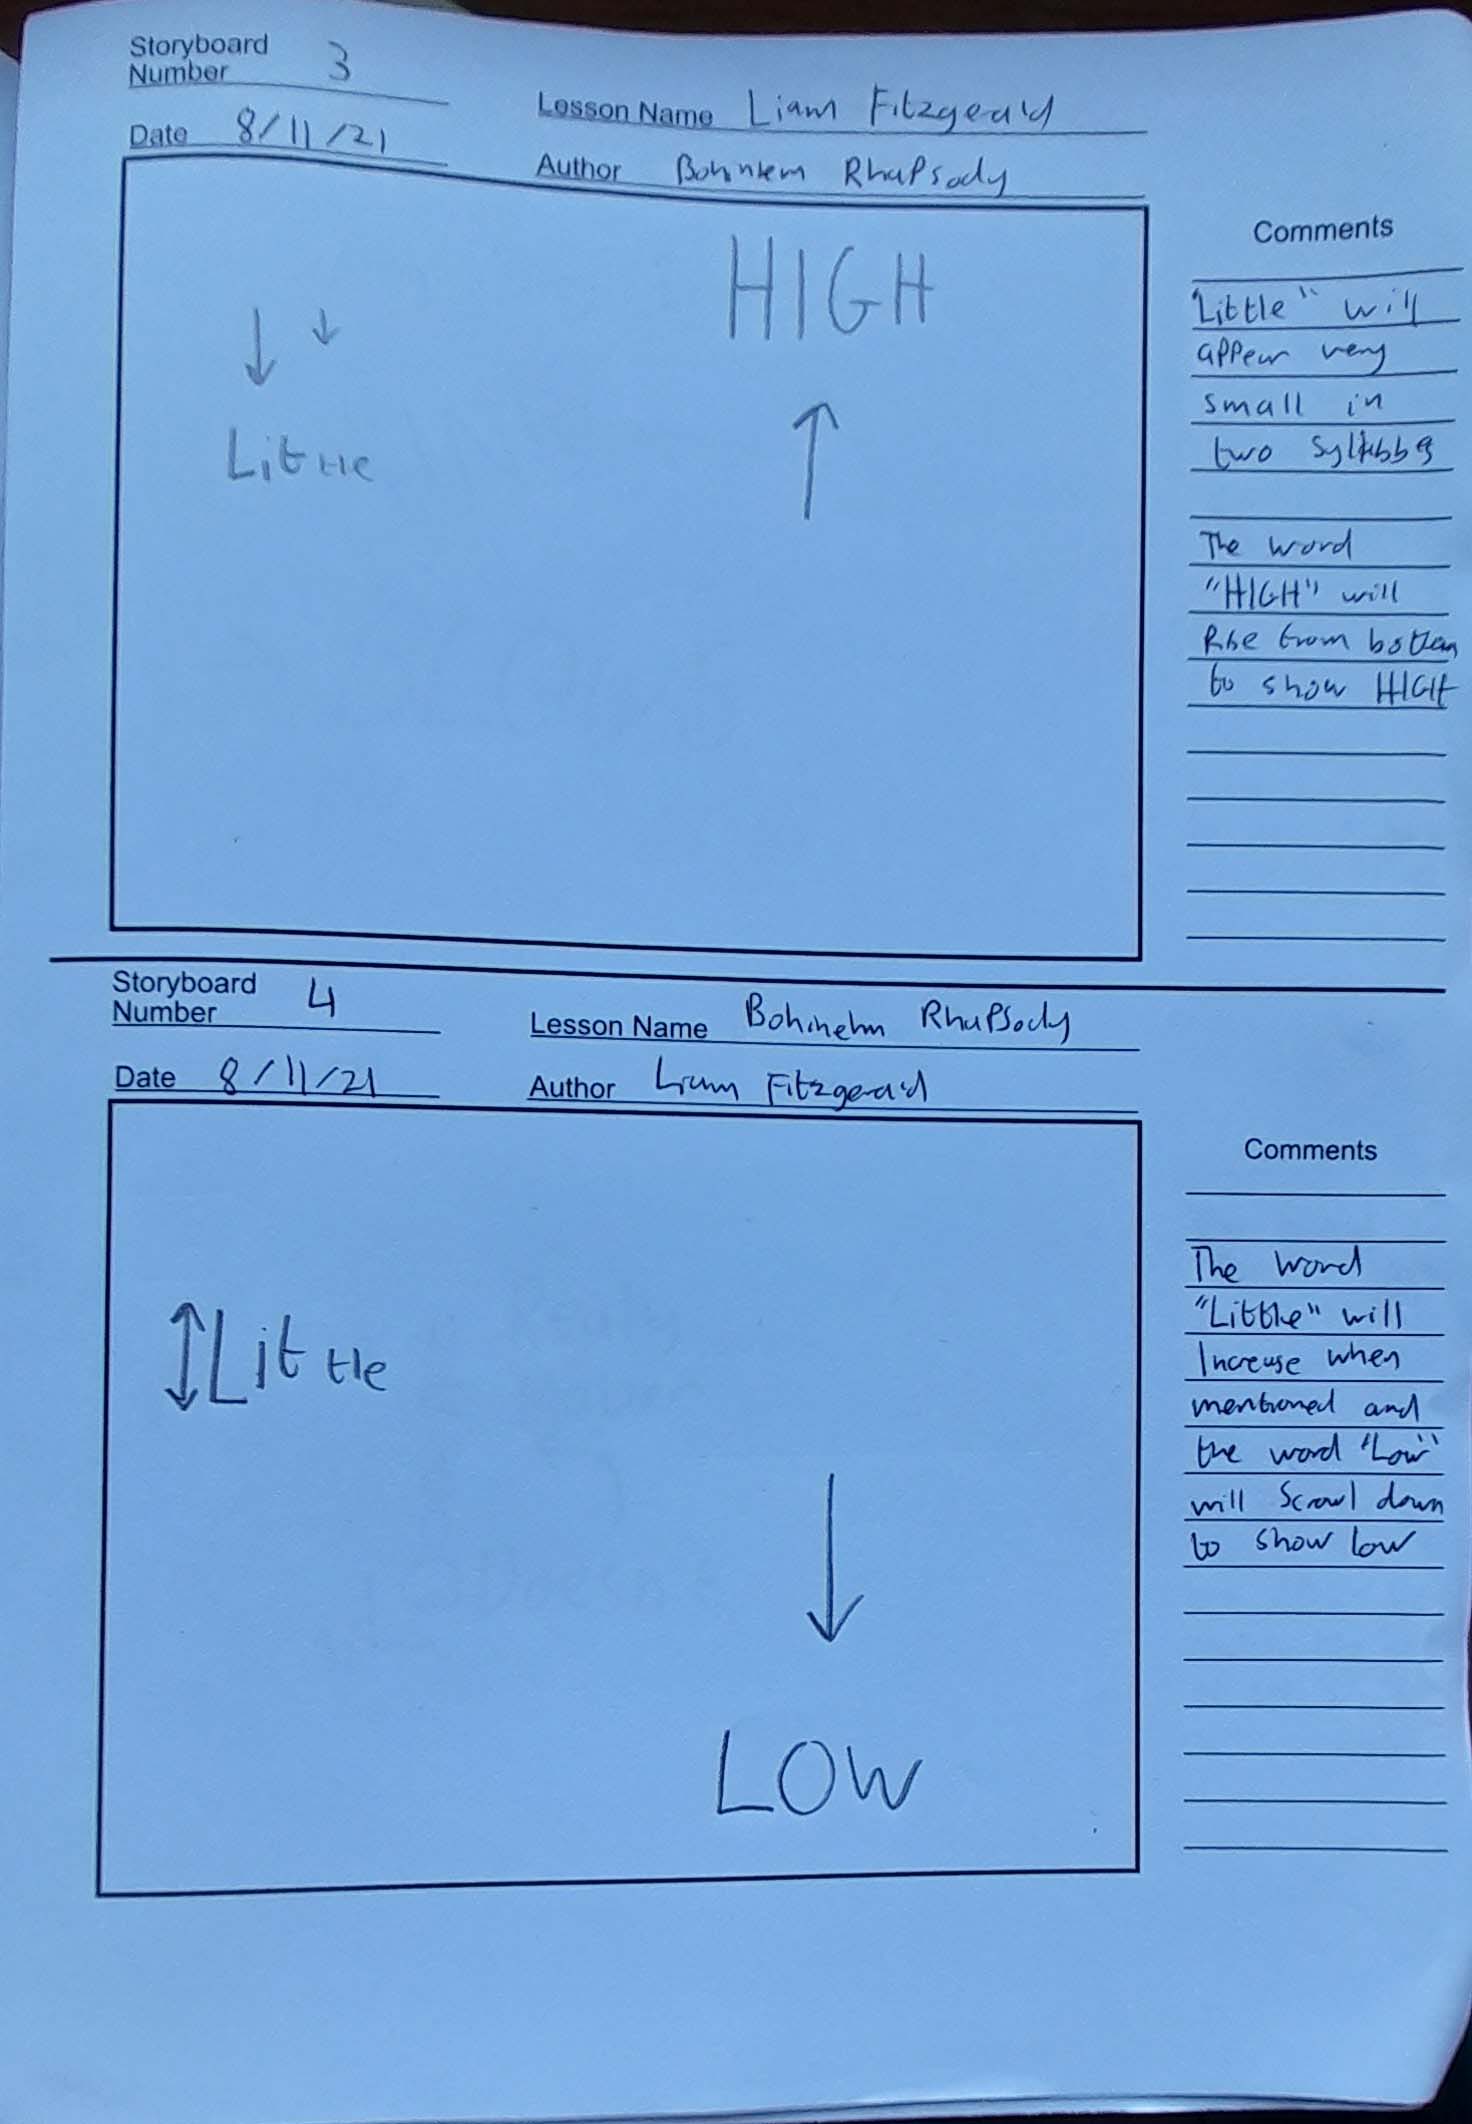
The next lyrics of the song were “Little High, Little Low,” as I drew in my Storyboard, I wanted the word “Little” to appear on the Middle left of the screen and be little to show the meaning of the word. I animated the word to fade and scale (110%) onto the screen with the Opacity and Scale settings. The next thing I did was added “High” and “Low” in two separate text layers because as I drew, I wanted “High” to scroll up, and “Low” to scroll down. “High” was scrolled between 1270 to –40 and “Low” was between –12 to 1277.
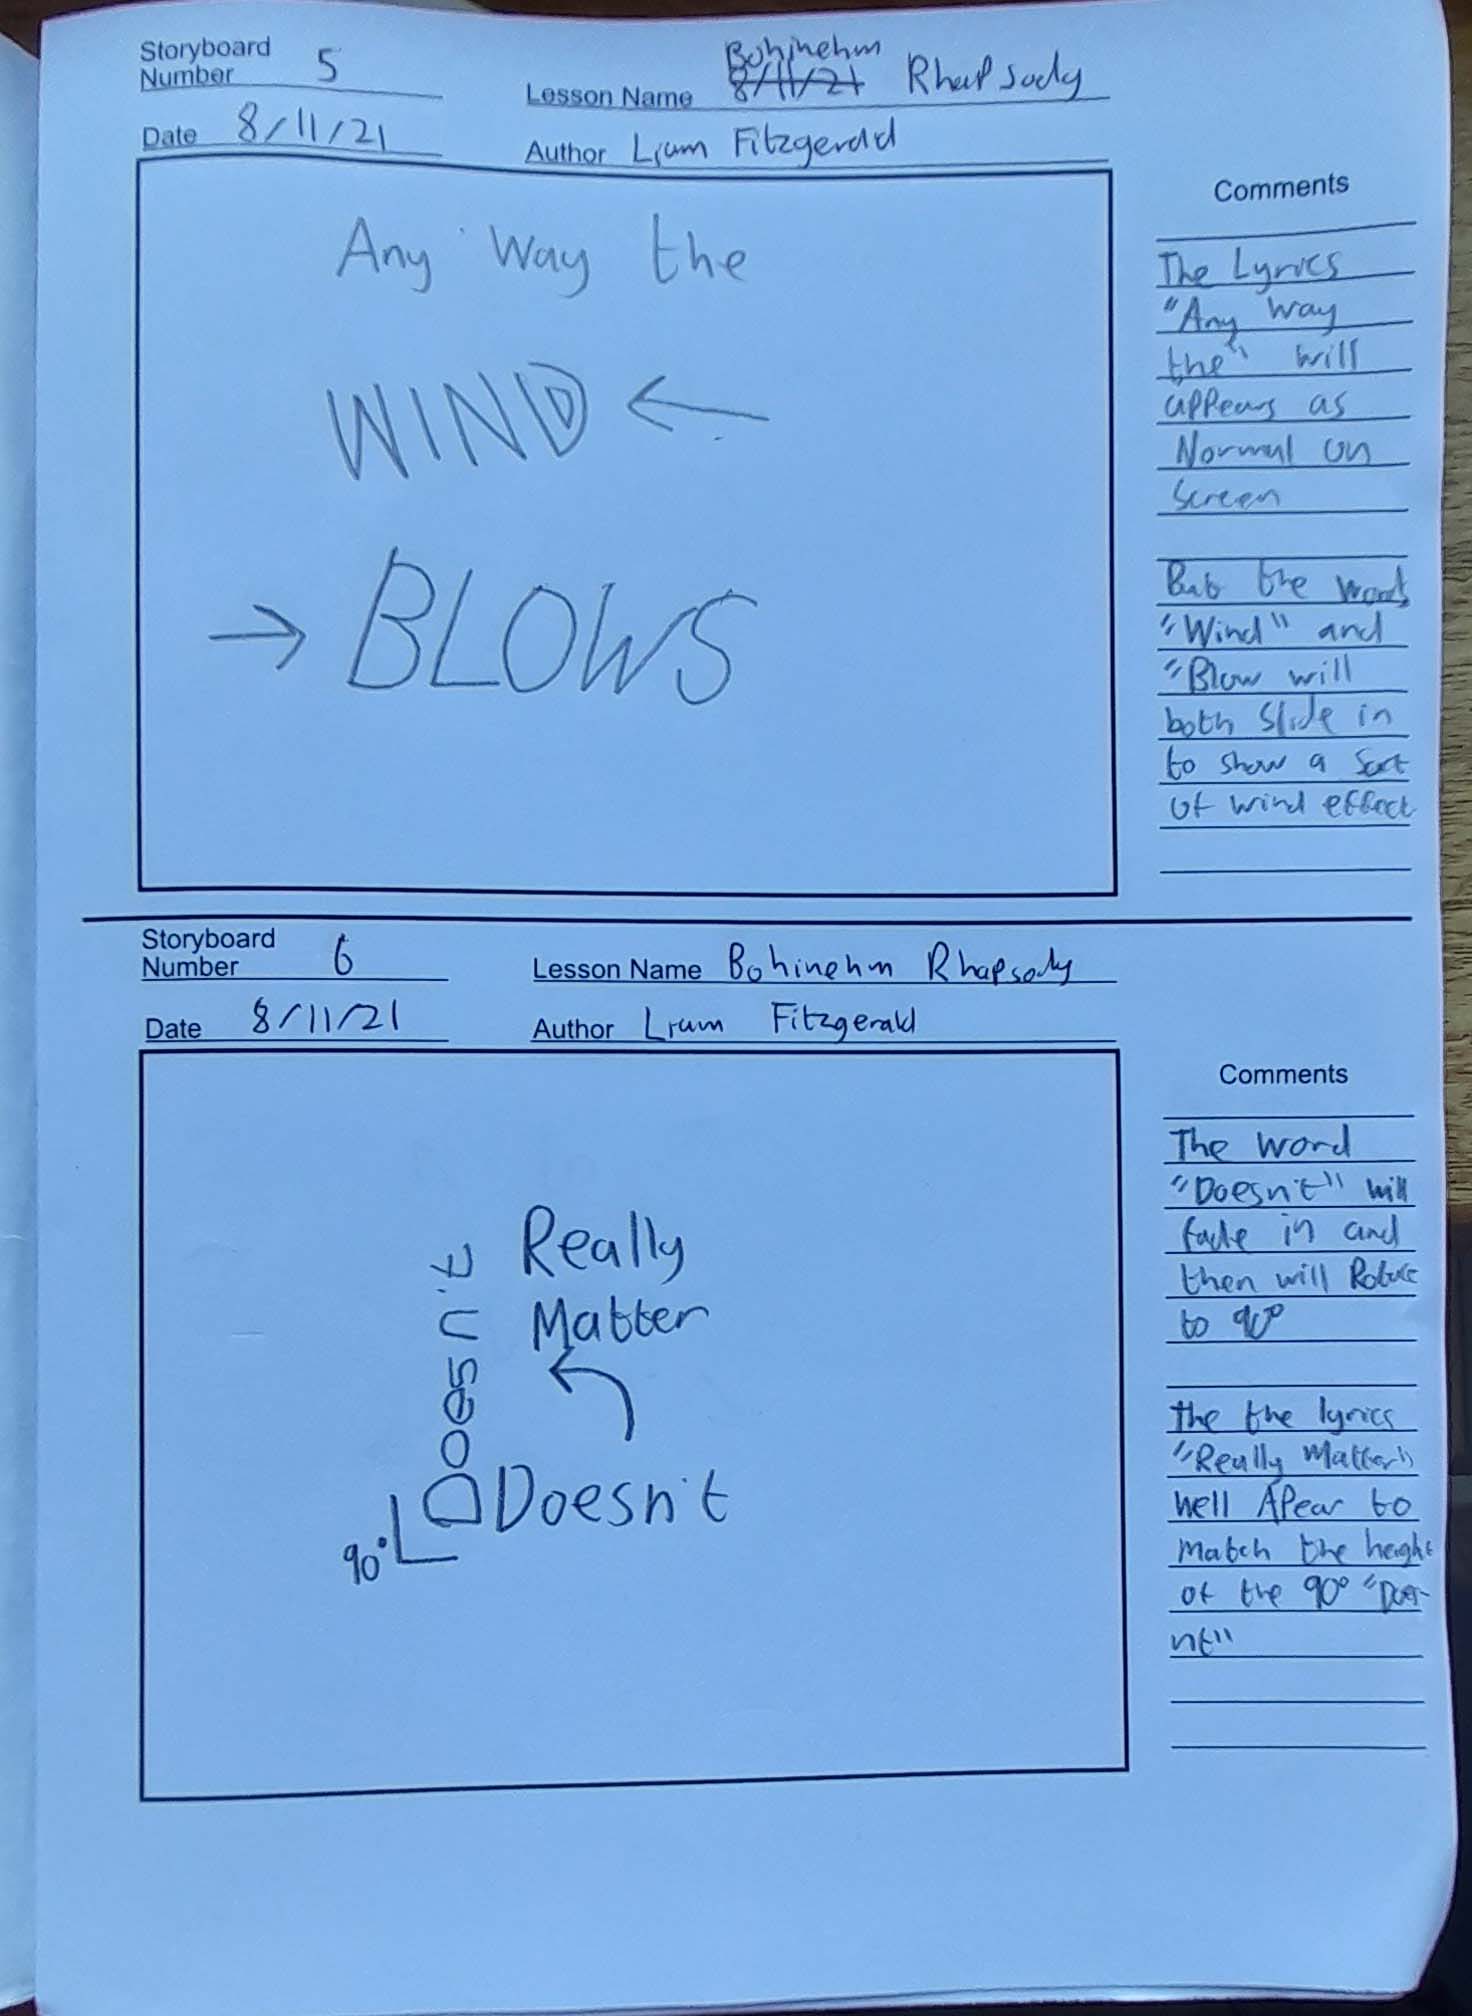
For “Any Way the Wind Blows” I had the first three words separately appear by using the following adjustments which I had in my Class.
- Opacity 0% to 100%
- Scaled 25% to 122%
- Scaled 122% to 100%.
I had used these adjustments while working on something different in my Graphics and Animation class, and since I really liked how it turned out, I decided to use it for a certain part of my Assignment, and I thought this part would perfect for it. For “Wind Blows” I want the text to be Italic and have the text animate across the screen like it was being blown by the wind. To make this happen, I made the following edits:
- Size: 408
- Faux Italic
- Wind Positions: 1928 to –1165
- Blow Positions: -1699 to 1949
For “Blows” I added a Skew Animation to make the text lean to the right (-21) since “Wind” was already leaning left. Lastly I made the lyrics “Any Way The” fade out as word “Blows” slides across the screen.
Reaching the end of my piece, I was now on last 5 Lyrics. I was happy with how it was turning out so far and hoped to keep it the same as my storyboards. Continuing with following my storyboards, I made the word “Doesn’t” fade in, BUT then I made it rotate to a 90-degree angle (-90 in After Effects) I had originally drawn for the word “Really” to just fade in, but I decided to change it a bit and do the rotation animation again, but have it done the opposite way, have it gone from 90 Degrees to straight (0 Degrees) and have it positioned on top.
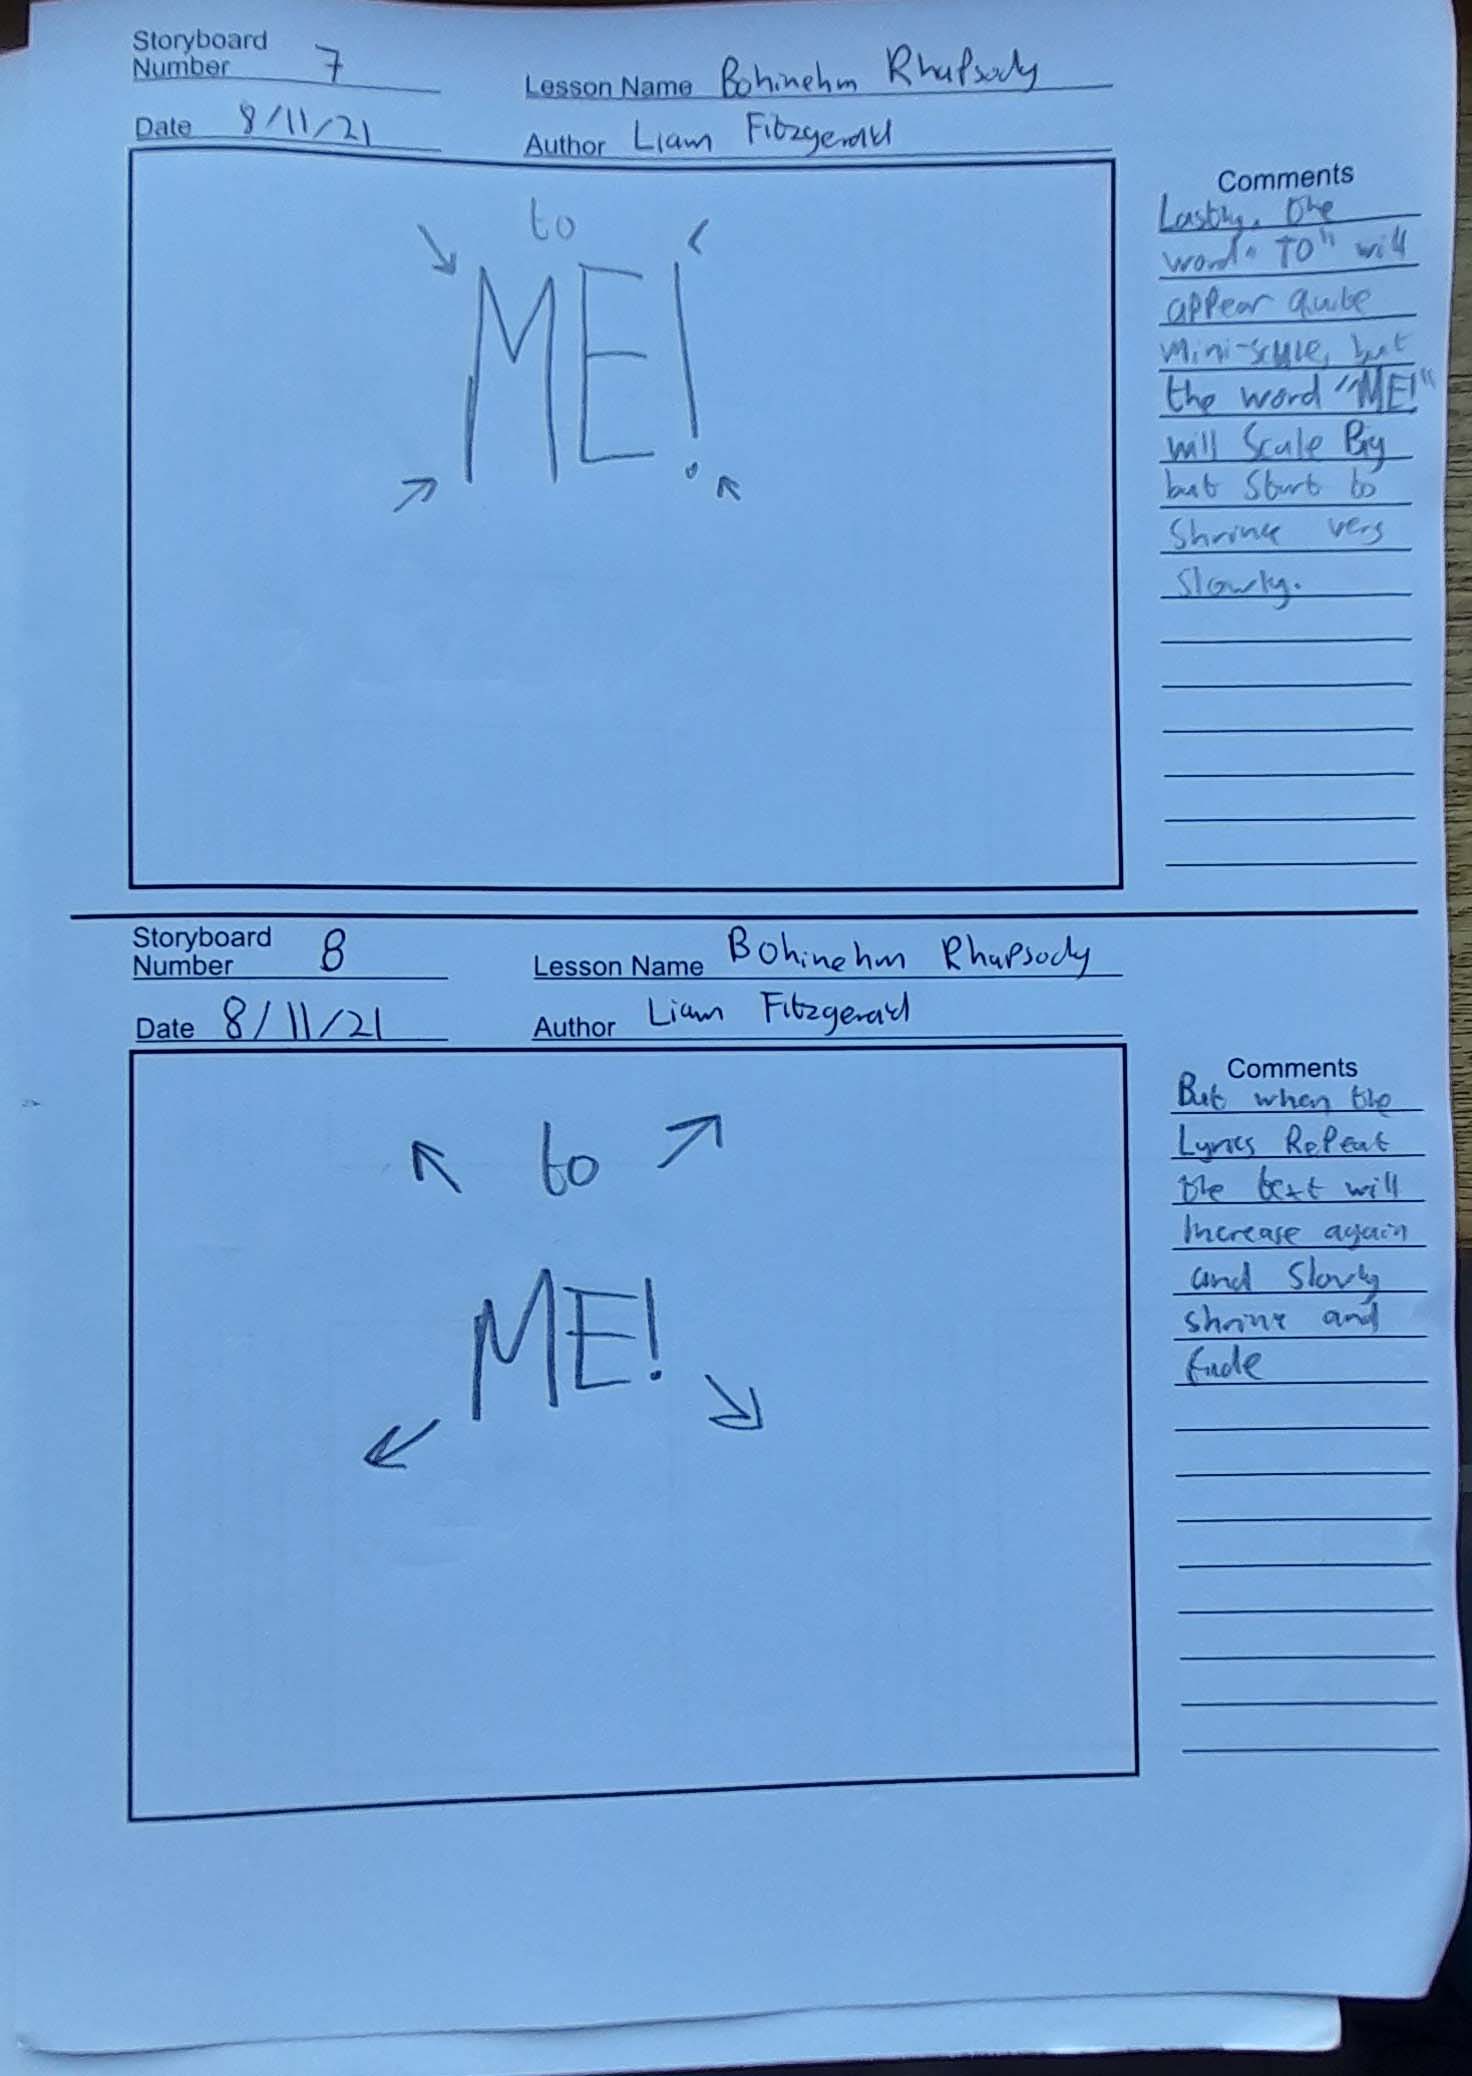
For “Matter”, I split the word into two separate Text layers because I wanted to fill in the space going down. I made the two layers scale right to 103% (MAT) and 126% (TER) keeping Constrain Proportions Link OFF. Finally, I had the last two lyrics “To Me” Scale up when said in the Song, but they are said a second time and when they are, I had them scale up bigger and then scale out of the screen to finish the piece. Once I had checked over my Kinetic Text and was happy with it, I could now Import it into an MP4 file using Adobe Media Encoder. I chose to Render with YouTube 720p HD and it came out perfectly.